Showing posts with label freezing. Show all posts

Tuesday, July 5, 2011

Food for An Angel

"Make me an angel that flies from Montgom'ry
Make me a poster of an old rodeo
Just give me one thing that I can hold onto
To believe in this living is just a hard way to go." -John Prine


I've recently made flan (twice) (click here) and red velvet cupcakes (click here), which left me with a quantity of egg whites in the fridge. Baking an angel food cake to serve with fresh berries is my favorite way to use them up. I actually had two cups of egg whites from all this and I simply proportioned this recipe up a bit to make a slightly bigger cake. Eggs whites freeze well and I often freeze in 1 1/2 c. quantities for baking these cakes.

Angel Food Cake
Sift together:
1 c. cake flour
1/2 c. powdered sugar
1/4 t. salt


In large bowl beat:
1 1/2 c. egg whites

When foamy add:
1 t. cream of tartar


When soft peaks form add:
1/4 t. almond extract
1 t. vanilla extract
1 c. sugar, adding 2 tablespoons at a time.


When all the sugar has been added and mixed in and you have glossy, stiff peaks (that aren't too dry), using a rubber spatula, fold in the flour mix. Plop into an ungreased angel food cake pan (I bought mine at a yard sale years ago) and run a knife in circles through the batter to release air bubbles.


Bake 325 degrees for 40 minutes. Cool upside down for 1 1/2 hours before removing pan (I was a bit impatient with mine; it didn't release cleanly and the edges were a bit jagged but it tasted just fine!)
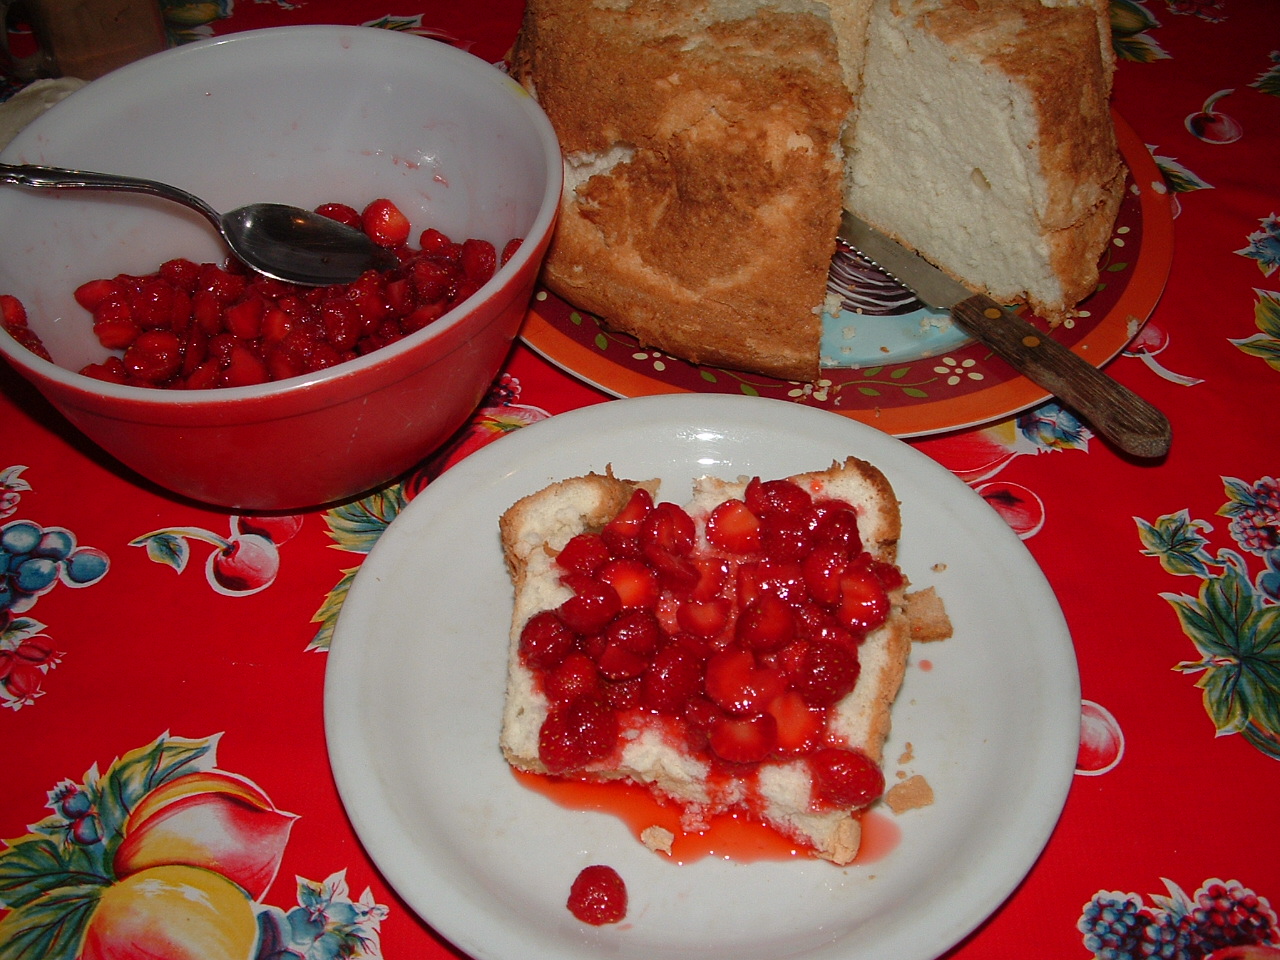


Slice using a serrated knife and serve. We had this cake with the most perfect small, dark red and incredibly fragrant strawberries freshly picked from the bed out back, then sliced and macerated with a small spoon of sugar to release their juices. When I was growing up, we always had scone/biscuit-like cake (click here) with our strawberries, but angel food cake is what my husband's family always ate summer strawberries on. Later in the summer when the raspberries are ripe, I prefer to make this following chocolate variation. All of these cakes served with just picked berries are truly food for an angel!

Chocolate Angel Food Cake
Sift together:
1 c. cake flour
1 1/2 c. powdered sugar
1/2 c. European style Hershey's Cocoa
1 T. Medaglia d'Oro instant espresso coffee
Whip until stiff but not dry:
12 egg whites (1 1/2 c.)
1/2 t. salt
1 t. cream of tartar
Add and fold in 1/4 c. at a time 1 c. sugar. Do the same with the flour mixture. Put into pan and bake 325 degrees for 40 minutes, or until top springs back when lightly pressed. Invert pan and cool.

Friday, June 24, 2011

When Spinach Bolts

Spinach is always included on lists of the top 5/10/100 healthiest foods and we always grow it in our garden. My computer tells me that it is 54 degrees in Snohomish, Washington -at midday mind you- only a few days past the summer equinox, and a week before the Fourth of July. Both of my daughters (loudly) wish they lived some place else, and are working towards achieving that goal, but my son absolutely loves the climate and weather of the Puget Sound area. On days like today, he declares it to be the PERFECT weather. Spinach loves it here, too, and June is peak spinach season in our garden. We have been eating LOTS of spinach in our salads, and I made Spinach with Thai Peanut Sauce (click here) the other night (which I LOVE!!). Sooner or later, even with cool temperatures, the spinach will bolt, signalling the end of its season, and that it's time for me to make creamed spinach and crepes. I made Spinach Crepes (click here) a few days ago and served them with chicken-fried cubed beef steaks and gravy made from the pan drippings. It was great. Spinach Crepes may not sound that inviting, but they really are fantastic. And if I freeze quantities of spinach now, we can also have them this winter. They make a great vegetarian meal when served with rice pilaf and a vegetable such as roasted beets or baked butternut squash, they can be made lactose-free by using soy or almond milk and omitting the cheese, and/or omnivorous when serving steak alongside. Making the crepe batter in the morning or the night before, allows me to walk in the door in the evening and rather effortlessly have dinner on the table within the hour. And I can't help but feel quite smug knowing I cooked a 32 cup bowl full of torn spinach, one of the healthiest foods, and my family ate it all by noon the next day. Sure, gravy made with steak pan drippings is on a completely different list of foods than spinach, but never mind that part -this is just the thing to do when spinach bolts.

Tuesday, March 29, 2011

Jamaican Patties


My husband brought Wingless Angels home last night. It was recorded at Keith Richards' home in Jamaica and is him and these amazing Rastafarian drummers from Steer Town. With only shutters on the windows of his house there, the sound of crickets chirping can be heard throughout this album -I love it! The music is so genuine and true with a predominately African sound. I'm not much of a traveler, but I do like to explore other cultures' music and of course, foods! Over the weekend (and completely unrelated to why he bought this album), I made these Jamaican Patties, a popular street food and the 'hamburger' of Jamaica.


Jamaican Patties
Adapted from Lucinda's Jamaican Kitchen by Lucinda Scala Quinn
To insure success, make both the pastry and the filling separately well ahead of when you want to assemble them, allowing time for the pastry to chill (I made the pastry first) and the filling to cool completely. It takes a bit of planning, but both pastry and filling can be made hours to days ahead, and otherwise these are very easy to make. And, here's my favorite part -they freeze well. I had planned to freeze half of these, but my people insisted on me baking them all that night, instead. Makes 16 patties, 2-3 patties per serving.

Filling
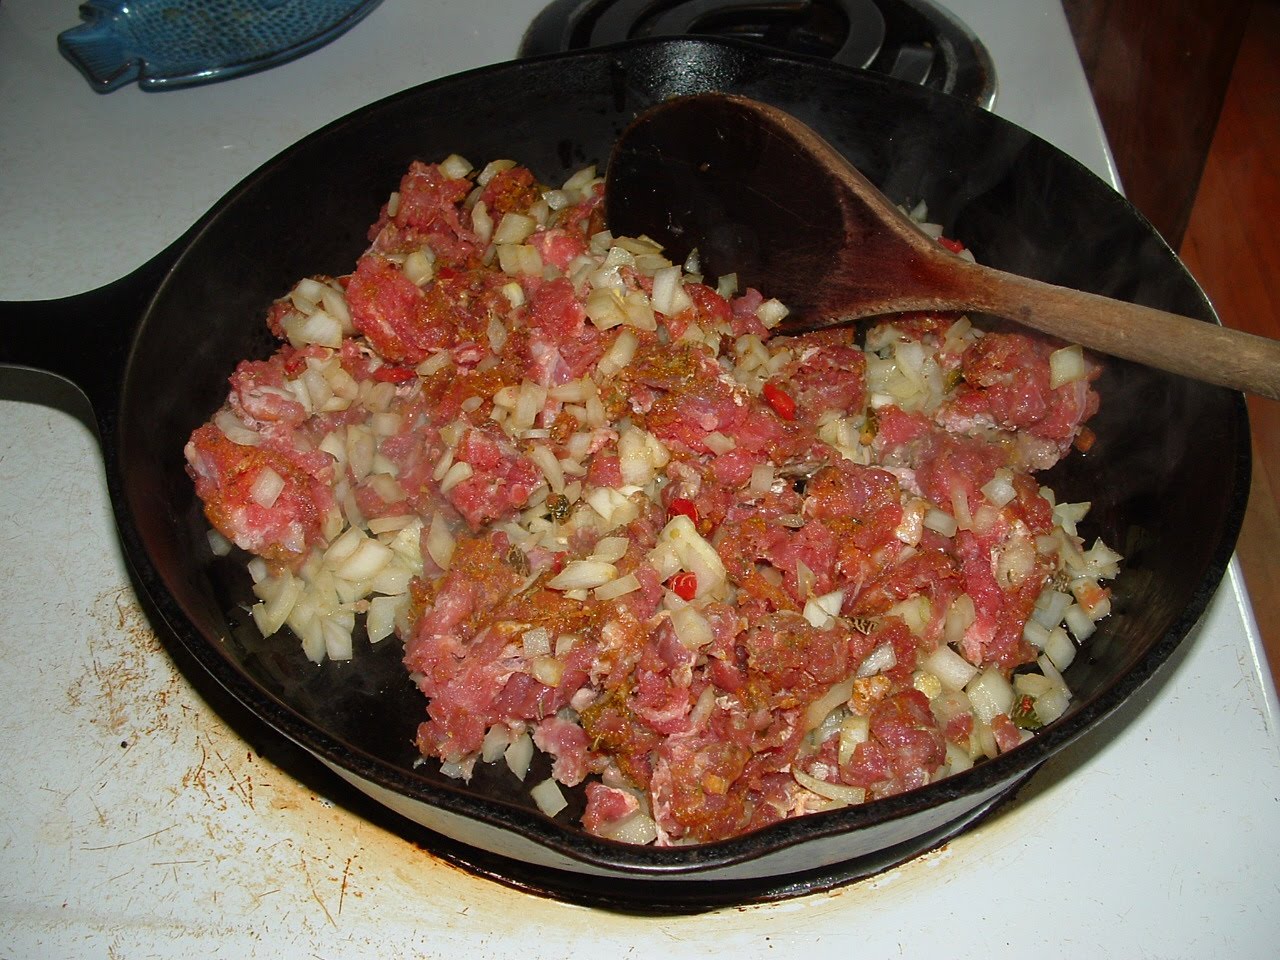
Mix: 1 lb ground goat or beef
1 onion, finely chopped
2 cloves garlic, pressed
2-4 hot peppers -Jamaicans use 2 Scotch bonnet peppers, I used 4 jalapenos from the freezer!
1 t. each dried thyme, curry powder and salt
1/2 t. black pepper

Heat 2 T. canola oil in a large skillet and add meat mix. Stir and cook until the moisture evaporates and the meat browns and forms a bit of a crust (10 minutes or so).


Add 2 cups water, stirring up the browned crust from the bottom of the pan. Stir in 1/2 c. bread crumbs to make a stew-like consistency. Reduce heat to low and cover. Cover and cook 20 minutes, stirring every 5 minutes or so. Remove lid and allow to cool completely.


Pastry
Mix:
2 1/2 c. all purpose flour
1/2 t. salt
1/4 t. baking powder
1 1/2 t. curry powder

Cut in:
1/4 c. vegetable shortening or lard (or all butter)
1/4 c. butter (or all vegetable shortening or lard)
Add 3/4 c. cold water, mix in and knead to hold together, but work as little as possible. Form two disks, wrap each in cling wrap, and chill 1 hour to 5 days.


To prepare patties, preheat oven to 400 degrees. Cut each disk into eighths, form 8 balls, and make patties one at a time. Roll each into an elongated circle. Spoon cooled filling onto one side, leaving room to fold over and seal edge. Moisten edge and crimp with a fork to seal.

Brush patties with 1 egg beaten with 1 t. water before freezing or baking. Oops! -I forgot to do this step! Ours were great without, but I think they would brown a bit better with an egg wash and will try and remember next time.

Place on a cookie sheet, eight fit nicely on one of my sheets, and then repeat with the second disk. OR cover with plastic wrap to freeze filled patties at this point, and then simply cook the frozen patties without defrosting. Bake patties at 400 degrees for 20 minutes or until golden brown. I served these with Jamaican Red Stripe beer and a large fruit salad, but red beans and rice would also be very good.

Monday, March 28, 2011

The Ultimate Meatball Experience

What is a burger but a large flattened meatball? In my opinion, a homemade burger is the ultimate meatball experience. Burgers are the quintessentially American food, and like it or not, our all-American beef patty served on a bun is the food poster child for our country. All too frequently there are troubling reports and concerns raised about the over 38 million American hamburgers eaten daily in our country, and as iconic as they are, I simply cannot remember the last time I ate a mega-chain burger. I do have a weakness though, for cheeseburgers served in small town cafes such as The Crow's Nest in Montesano. We stop there often when we're driving through, and of course, the Pioneer Farm beef burgers Judy Pederson cooked up at the Snohomish Farmers Market last summer were an almost weekly treat. I don't think that all burgers are all bad, but I do agree there are a lot of really bad burgers being sold and eaten.

Being a passionate home cook, with a special fondness for a good burger, and having worked in several small cafes that served good all-American burgers, I often make them at home. They are sometimes exotic, like the Banh/Bahn Mi Pork Burgers I made (and misspelled) last summer, or more often than not, I make a straightforward all-American-style burger. Just as a drive-through burger is a quick meal to grab when life is hectic, a burger made at home is one of the quickest and easiest thing in the world to cook. I learned this from my Old Granny (click here), who always kept on hand a stack of beef or elk burger patties in her freezer. As marauding teens we knew we could show up at her doorstep with any number of friends in tow, and she would make burgers for us all. Many adventures (and misadventures) began (or ended) with, "Hey, let's stop at Grandma's house!" At any time of day or night, if her lights were on and she was still up, we could stop by and she would always ask, "Are you kids hungry?" Buns from the freezer were quickly toasted, and frozen meat patties went straight onto the griddle. A patty of good quality ground meat, not too lean or too fat, served on a bun with various condiments pulled from the fridge, all ready to eat at her kitchen table within just a few minutes. Of course, she would invariably make up a salad or something else to have along with the burgers, and she always had ice cream in the freezer and a cake of some sorts under cover on her counter for us to polish off.

We made burgers twice last week -it was one of those weeks. I wasn't thinking 'blog post photos' when I was making them and didn't take any -everyone knows what a burger looks like anyway. I often portion and freeze individual patties, as my Old Granny did, when I'm not using all of a package of ground meat, or when I'm thinking ahead to having an answer for, "What can I make for dinner that can be ready in the next fifteen minutes?" I shape individual patties in a plastic sandwich bag and stack them in the freezer. If I have the time and plan ahead, homemade burger buns are absolutely heaven, but if not, my Old Granny's always-keep-some-buns-in-the-freezer trick is good for RIGHT NOW meals -or we simply use whatever bread is at hand. Burgers from different meats each have their own character and goat and lamb are both very tasty. I made this week's burgers with ground beef that was raised by my sister-in-law. Because I intimately know where the ground meat for our burgers comes from, I don't have to cook the living daylights out of them. Mayonnaise, ketchup, and mustard (or a dollop of special sauce) are the usual requisite condiments, along with some lettuce, tomato and dill pickle slices -cheese and onions are optional- and Zucchini Relish. My cousin, Michelle says Zucchini Relish is the whole point to having a hamburger, which may be going a bit too far, but it is definitely an important part of a good homemade burger like those eaten at my grandmother's kitchen table.

Wednesday, March 2, 2011

Green Enchilada Sauce


I can't believe I haven't talked about making green enchilada sauce yet! Every year, we grow tomatillos to make and freeze into this sauce. In the late spring, my husband and I negotiate how many plants to grow. I always propose 'LOTS' but my husband, ever the voice of reason, manages to convince me to exercise a bit of restraint -last year I think we bought four plants.


It doesn't matter how few plants we grow, we always end up with a bumper crop of tomatillos. And the next season, volunteer plants will continually be popping up all over in the area where the tomatillos were grown the year before. I make green sauce in late summer and early fall to freeze in 1 quart containers that we use all year round. I love it's bright, citrusy flavor that's especially welcome now, when it's still several months before we can expect any fresh produce from our garden. March can be particularly dreary, garden-food-wise as well as otherwise, and this green sauce is an uplifting reminder of the green and growing garden flavors of spring and summer.


Green Enchilada Sauce
In a large pot, place:
2 quarts peeled and washed tomatillos
4 quarts water
Bring to a boil and cook until tender, about 10 minutes. Allow to cool slightly.


In two or three batches, put in blender with 3 c. cooking liquid and:
3 garlic cloves
1 1/2 c. cilantro leaves
1 onion, diced
Puree until smooth. Heat 2 T. oil in heavy-bottomed pot and add puree. Add 1/4 -1/2 t. salt and 1 t. sugar. Simmer 5 minutes.

Unlike when canning it, sauces that are frozen do not have to be exact. I don't really measure this when I'm making it, and sometimes I make huge batches and sometimes just a quart of it. Speaking of canning sauces, I was so excited to see this recipe, which can be made during canning's off-season, for making and canning red enchilada sauce (click here). Now, thanks to dandelion at Knit & Nosh (Thank-you, Thank-you, Thank-you!!!), I can make and store both green AND red enchilada sauces. How cool is that?


I mostly use my Green Enchilada Sauce to make enchiladas like these (click here), but it is also great in soups, and this amazing burrito filling (click here) with pork, black beans and rice.

Tuesday, February 1, 2011

Thai Noodles with Peanut Sauce


I love Thai foods and Thai cooking. Years ago I took a series of cooking classes at PCC Natural Markets, where one of the classes was Thai cooking taught by a lovely woman named Eng Tie Ang. I bought her little cookbook at the end of class, and have used it many times over the years. Her recipes are very straightforward and make it very easy for any home cook to successfully make authentic Thai foods. This cookbook though rather small, has allowed me to easily make many complete family 'Thai-night' meals and The Spicy Fried Ginger Beef recipe is one of my husband's absolute favorites. I adore Thai Peanut Sauce and after learning how easy it is to make, I also learned that the rest of my family is not quite as enamored with it as I am, and though I'm happy to eat most of the entire batch by myself, it is probably not in my best interest. I was overjoyed to discover, that I could make Thai Peanut Sauce, package it in individual servings, and freeze it. It is most traditionally served with satays (and would probably be really good with meatballs, too) but I love it best with spinach and tofu. Yesterday, I came inside to find my daughter making herself noodles with tofu and some stir-fried vegetables for lunch, and she had made more than enough for two. I defrosted some frozen spinach cubes from last summer, a frozen container of Thai Peanut Sauce, and within five minutes I was in Thai noodle heaven.


Making Thai Peanut Sauce (click here) when you don't have any in the freezer is actually super easy. Tofu can be purchased already seasoned and cooked, but I prefer to simply fry cubes of firm tofu (after blotting with paper towels) for this. With some cooked spinach (fresh, or frozen and defrosted), soba, udon or even spaghetti noodles, and cooked tofu (or cooked chicken breast or shrimp), Thai Peanut Sauce makes an interesting, quick and easy weeknight dinner.

Monday, January 31, 2011

Shepherdess Swedish Meatballs


One of the many things I love about meatballs, is that they can be frozen. Back in December I made Swedish Meatballs, after looking at several recipes and freezing half of the uncooked meatballs for another time. Yesterday, when I decided to make Swedish meatballs again, the little bag of them was there in the freezer, and I was more than halfway done already. In December I'd made them in a Dutch oven on top of the stove like this (click here), and let them simmer for a good half hour. Yesterday, I wanted to put the meatballs on to cook and go do OTHER STUFF, so I made them in the crock-pot. This worked wonderfully. I was able to spend the afternoon weeding and knitting while they were cooking unattended, and when it was time for dinner all I needed to do was cook some egg noodles.


Shepherdess Crock-pot Swedish Meatballs

Brown meatballs (thawed or unthawed frozen), either on an oiled sheet in the oven, or in bit of oil or butter in a skillet. I must admit that I browned these in a bit of bacon fat left in the caste iron skillet from breakfast, which (besides confessing to using bacon fat here) means it was past noon and the breakfast dishes were still lying about, but my motto for weeding is, weed first and do dishes after, gloves or no gloves, which is the only way I seem to be able to get my hands reasonably clean.

Put the browned (and drained) meatballs into the crock. Drain all but 1 T. fat from skillet and add 2 T. flour to make a roux. Stir in 3 c. lamb stock (or beef stock) to make a thin gravy.

Add:
3/4 t. salt
1 t. dill weed
dash allspice
1 T. ketchup or tomato paste
glug or two Worcestershire Sauce

Pour gravy over meatballs in crock-pot. Cook low 3-4 hours. To serve, add 1/2 c. sour cream and stir in. Meanwhile, cook 8 oz egg noodles until done, drain and stir into meatballs. Serve with a vegetable or salad. A bit of currant jelly added would be traditional, but I had a glass of currant wine after dinner instead.

Thursday, January 27, 2011

Risotto and Homemade Stock


Every food writer and cookbook will tell you you should make your own chicken broth and/or similar stocks. They tell you it's a cinch to make, it tastes vastly superior to the store bought stuff, and it is very economical to do. You simply save all bones, roast carcasses, etc. in Ziploc bags in the freezer and then one day when you have time to putter in the kitchen, you put them in a pot, add onion, celery, carrot, black peppercorns and a good tablespoon of salt, cover it with water and completely cook the essence out of it all. I am pretty good about putting meaty bones in bags in the freezer, but in all honesty, I buy my fair share of Swanson's-style broth, too. I just don't always think far enough ahead to have the stock made in time before I need to use it. The other day, I decided I wanted to make risotto. I decided this early enough in the day, and on a day when I was home, and since all those bags of bones were falling out of the freezer onto the floor every other time we opened the door, and the cupboards (and freezer) were bare of any ready-made broth, I made homemade broth. I filled my pressure cooker with frozen bones and stuff, cooked it all 20 minutes at high pressure, left it to cool, and then strained the broth off. It was incredibly delicious, and the remaining bones and stuff made an old farm dog very happy. Broth actually IS a cinch to make, and I froze half of what I made, ready and waiting for the next time I want to make risotto.


Separate from the homemade broth issue, there is lots of grumbling about the actual act of making risotto. Oh sure, it's fantastic and all that, the grumblers say, but you have to stand there and stir it for 20 minutes, and who has the time? There is a pressure cooker recipe, I have made it and I admit, it's good, but honestly, I LIKE stirring the risotto for those twenty minutes. I like to clear the decks (OK, no one expect me to do ANYTHING for the next twenty minutes -I'm making risotto!) and simply focus on doing one thing: stirring. OK, two things, if I drink a glass of the wine while I'm standing there stirring. It is a simple yet extravagant dish, and probably one of my favorite things to eat. With broiled lamb chops and a green vegetable (we had frozen broccoli from last summer) or salad, it is hard to beat. Except maybe as leftovers, either simply reheated, or mixed with a beaten egg and Italian bread crumbs, then formed into little risotto cakes and fried in olive oil.

Risotto

Melt:
2 T. butter
2 T. olive oil

Add:
1/2 onion, chopped
2 garlic cloves, minced
5-6 mushrooms, chopped (optional)

Saute a few minutes. Add:
1 1/2 c. Arborio rice
Cook, stirring for a few minutes then add:
1/2-1 c. white wine (optional) If you open a bottle of wine for this, you can drink a glass while you're doing all that stirring. And if you freeze the last 1/2-1 cup of wine in the bottle, you will be ready for the next time you want to make risotto and don't have a bottle of white wine at hand.

Add, 1/2 - 1 c. at a time, 1 quart hot stock (preferably homemade) over twenty minutes, stirring constantly while risotto simmers.

When rice is done (al dente) stir in:
1/3 c. shredded or grated Parmesan cheese (optional)
pinch white pepper
salt to taste (AFTER adding the Parmesan)
Cover with a lid, remove from heat, and let set a few minutes before serving.

Wednesday, November 17, 2010

Tamale Pie


Even by my standards, this is a rather lame photo. Please remember, looks aren't everything. The infamous Marion Cunningham wrote she always wanted to open a tamale shop called Holey Moley Tamales and serve this as the house specialty, seeing it as a rare example of more being better in a dish. I made this last night, and for the life of me, try as I might, I can't remember the first time I ever made this. I remember making it early on when we were just a young couple, I remember making it when I had 9 tots around the table in my home day care, and I remember it being devoured my a trio of teens and their friends, but I can't remember where I got the recipe (The Oregonian's FoodDay?). Tamale Pie is just something I've always made, and I will say, it is universally well received by all. It can easily be made vegetarian, or bare essentials style, or holey moley style, with anything you might want to add. It is a fabulous week night supper recipe: the-little-pan-that-can, bake until bubbly, satisfaction at its best.

Tamale Pie
Using a 6-quart pressure cooker, cook 1 1/2 c. pinto beans in 1 1/2 qts. water at high pressure for 30 minutes. Shut off heat and let pressure drop naturally (Or use two cans of black beans).

Oil or spray a 9 x 13 inch Pyrex dish, or an 8 inch square and a second dish for freezing unbaked -two for one bonus cooking! Preheat oven to 350 degrees.

Mix in a pot:
1 c. water
1 t. salt
1 c. yellow cornmeal
Add:
1 c. boiling water
Cook, stirring until thickened. Spoon into baking dish(es) and spread (or pat out) evenly to form a bottom crust. I sometimes also bake it all in a smaller 7 x 11 inch dish and form a side crust.

In skillet, cook 1-2 lbs ground beef (or pork sausage, or a mix of the two. Omit for vegetarian, or substitute shredded chicken or turkey)
Season with: 1 t. each cumin, chili powder (optional), garlic and salt
Add:
1/2 - 1 chopped onion or 1 large leek
1 pint home canned tomatoes, 15 oz can tomato and/or 8 oz can tomato sauce, or 1 c. salsa

Optional additions I didn't use:
4 oz. mild green chili peppers (or minced fresh or frozen jalapeno)
1 bell pepper, diced
1-2 stalks celery, diced

Add to skillet, or layer separately:
Well drained beans
15 oz. can or 1 pint home canned (or 1 1/2 c. defrosted frozen) corn
Cover cornmeal crust with this filling or layer components. For this one, I cooked and seasoned the ground beef, then simply layered it with the beans, some sliced leeks and blopped on some salsa. I could only find a shy 1/2 c. in the fridge and no tomatoes in the cupboard and it was still great. This is an extremely flexible casserole that can't go wrong -my favorite kind!

Top with:
1-2 c. grated cheddar cheese
15 oz. can sliced black olives
Bake until bubbly, 20 to 60 minutes. Serve with ketchup, sour cream -and pickled jalapenos!

Wednesday, October 13, 2010

Corn Harvest


In the animated movie The Lion King (which I have seen, or at least listened to, probably 5 million times, I kid you not) the importance of the The Great Circle of Life on the African Savannah is explained in a Disneyfied way. No less important than The Great Circle of Life, here with our garden and farm animals, we also have The Great Circle of Poo. It works something like this: We raise a garden and farm animals. Besides their pasture, winter hay, and grains, we also feed the animals little tidbits (weeds, trimmings, over mature produce, etc.) from the garden. Once or twice a year, we then haul their accumulated manure from the barn and chicken house, pile and compost it, then haul and spread it over the beds to mulch and fertilize the garden. I should add that this hauling is all uphill, which is just about as much fun as it sounds.


Uphill or not, it takes about five years for the soil to build up. We are now at year seven of manure hauling and growing vegetables here, and it's as if there is some sort of plant growth hormone or steroid in our garden soil. Our corn was planted in the spring, despite the wet weather (practically a monsoon actually), and it ripened during our extended season of mild weather.


I know in places outside the Pacific Northwest, many count on an annual bumper crops of corn and indeed, our nation (and increasingly the world) economically counts on it. We don't, and so this harvest is a big deal for us. I was so pleased to can 14 pints of corn, plus have that much more, and then some, to freeze, both on the cob and cut off.


It's not so bad if the cobs have been blanched first for freezing, but cutting fresh corn off the cob for canning splatters it everywhere. You should only use pint jars to can corn and then process them in a pressure cooker for almost an hour (without going outside to the garden or barn). Despite all this, it is very satisfying to know we will have our very own corn to eat this winter.


And the circle continues: the chickens get to peck at the bits left on the cut cobs and Paris, the hulking ram beast, gets to root around in the corn silk and husks. The flock all enjoyed eating the husks, though it's more of a novelty than a seriously nutritious food for them. Perhaps not as bad as say, Cheetos, but still...I'm sure it's not a particularly fantastic feed.


And now, I need to go work at hauling the manure out of the barn for next year's gardening. My son, who recently moved out on his own, has done this chore for me the past couple of years. I have to admit I've had it pretty easy lately, but now it's again back to being my responsibility. I've come to realize spinning, knitting and cooking do not get one in shape for barn cleaning. On the other hand, cleaning a barn out using a pitchfork and a wheelbarrow, with the manure pile UPHILL from the barn, gets one in shape for just about anything.

Sunday, September 12, 2010

Basil Pesto for Freezing


"If I had to choose just one plant for the whole herb garden, I should be content with basil." -Elizabeth David, Italian Food

Basil is one thing my husband always grows in the garden, and now is the time to make pesto for freezing while the plants are a profusion of basil leaves -and before the cold comes and turns the leaves black overnight. The bees love the flowers, and while picking the leaves their hum and the scent is overwhelming. Making and freezing pesto captures basil's inimitable flavor and aroma to enjoy all year long. I pick about 5 quarts of leaves when making pesto to freeze.


I like to add a tiny bit of rosemary to my pesto. It's not crucial but I think it adds something special.


I also like to use a fair amount of garlic when making pesto. It was a good year in our garden for growing garlic and it makes me happy to know I can use it as liberally as I want.


Basil Pesto (for freezing or to make about a pint)
8 cloves garlic (or more)
1 t. salt
2 t. fresh picked rosemary leaves, minced
1/4 - 1/3 c. pine nuts
5 quarts fresh picked basil leaves (or as much as will fit in your processor)
3/4 c. or more olive oil, pour over layers of basil while adding and processing
In food processor add garlic, salt and rosemary leaves plus basil to fill processor bowl and some olive oil. Process. Keep layering and processing, and it will all eventually fit. Add pine nuts when half of the basil is processed. Add more olive oil if it seems to need it.


I then freeze the basil pesto in 1/2 c. containers. It defrosts quickly and can be stored in the fridge for several weeks.


By adding a bit of pesto -with or without the addition of grated Parmesan- simple meals of plain pasta and one or more vegetables or fresh tomatoes (during their brief season), can be transformed from mundane into extraordinary. Spending a few hours now making basil pesto will provide us with it all year long. And the kitchen smells so amazing while I'm making it!

Thursday, July 15, 2010

The Best Blueberry Muffins


We have ten blueberry bushes that are about five years old. There are several varieties, allowing us to have fresh berries over a longer season, and the earlier types are beginning to produce fruit now. I adore blueberries and am somewhat crushed that my daughters don't really share my sentiment. I say it leaves more for the rest of us, but I honestly cannot understand -how can one not be absolutely crazy about blueberries?


Blueberries are a fantastic fruit to raise, harvest and cook with. They are easy to pick -no thorns or prickles. To freeze them, simply put them in bags without washing, and then pull frozen blueberries from the freezer all year long to enjoy -at least as long as they last. We eat them frozen straight from the bag, or defrosted and made into crumbles, crisps or a scrumptious blueberry sauce to pour over waffles and pancakes. When the bushes are in full production I make jam and canned blueberry pie filling and am hoping to make some country wine. These muffins are one of the few ways that the girls enjoy eating blueberries. I make them often, using both fresh and frozen berries with equal success. These really are the very best blueberry muffins -ever.


The Best Blueberry Muffins
Adapted from Muffins by Elizabeth Alston
In stand mixer bowl, beat:
1/2 c. butter, softened
1 c. sugar
Beat in one at a time:
2 eggs
Add:
1 1/2 t. vanilla
2 t. baking powder
1/2 t. salt
Add and beat until they are quite mashed:
1/2 c. blueberries (defrosted, if using frozen)
Add half at a time and fold in:
2 c. flour
1/2 c. milk
Fold in:
1 c. blueberries (don't defrost, if using frozen)
Use an ice cream scoop and fill well-greased or foil-lined muffin tins (the paper-liners have a tendency to stick). I always seem to have a bit extra so I make a wee little loaf cake, about the same amount as for two muffins, and it cooks in the same amount of time as the muffins do. Give it to some deserving soul who will be absolutely delighted.
Mix:
2 T. sugar
1/4 t. nutmeg
Sprinkle sugar mix over the tops of muffins before baking. Bake 350 degrees for 25-30 minutes. Cool muffins half an hour in pan before removing to rack (I always forget this part without any disastrous results). I love to make these and have them ready and waiting the next morning for breakfast.

Sunday, July 11, 2010

Heavenly Fava


Fava beans, also called broad beans, are the Arnold Schwarzenegger of beans. They are huge! The first time my husband grew them, I wasn't impressed, but I have since come to adore the heavenly fava.


The key is to pick them young and tender. What seems like an enormous pile in the pod will yield a relatively small quantity of beans.


The beans look so cute nestled in the pod -like little baby beans!


Young and tender like this, they are delicious. If older, you will want to slip them out of their skins as they become bitter later in their season. This is a time consuming task, slitting each individual skin and popping the bean out, so harvesting early is my goal.


A small quantity of bean is filling -two quarts of shelled beans is enough for three or four meals. I blanch them in boiling water for three or four minutes, cool quickly in cold water, and package for freezing.


The simplest way to cook them, fresh or frozen, is to heat 2-4 T. olive oil, add 2-4 minced garlic cloves. When garlic begins to brown, add 2 c. fava beans and cook until tender. Often I add 3-4 minced anchovy fillets with the fava beans. The anchovies here do not 'taste fishy' but really make this delicious. This makes a tasty vegetable side dish or for a complete meal I make:

Fava Beans, Orzo and Quail Eggs
Hard boil, cool and peel 8 quail eggs, if you can get them, 4 chicken eggs if not. Cook 8 oz. orzo pasta, or any other pasta shape, al dente and drain. Toss all with fava beans -cooked as above just till tender with olive oil, garlic and anchovies. Serve with black pepper and parmesan -and salt if you didn't use the anchovies, though I seriously suggest you do.

Monday, July 5, 2010

Spinach and Thai Peanut Sauce

"If everything seems to be going well, you have obviously overlooked something." -Steven Wright


"It is a rule of nature that taking a day off on a farm sets a person back at least a week." -Jane Hamilton

Returning from a few days off from the farm, garden and home cooking, I'm pondering these truths. Freezing spinach (I should have had this done a week ago), and weeding in the garden (which is never really done) are my first tasks to tackle in a somewhat futile attempt to reestablish the tenuous feeling of being on top of things here.

Freezing chopped spinach in ice cube trays like this, makes individual portions to defrost and use in winter. To freeze, plunge washed spinach into boiling water then return water to a boil. Immediately drain and place in cold water. Drain and put in cold water again. Squeeze dry, chop and fit into ice cube tray. Place in freezer overnight then remove cubes from tray to store in labeled freezer bags. Remind teens to eat it. Some of their favorite ways to use frozen spinach are in soups, as a filling for omelets or crepes -and with rice and Thai peanut sauce. I like to keep frozen portions of this peanut sauce and spinach on hand in the freezer.

Thai Peanut Sauce
Heat:
2 T. vegetable oil or 2 t. chili oil
Add:
3-4 garlic cloves, minced
Add:
3/4 c. water
14 oz. can lite coconut milk
1 c. smooth PB
2 T. brown sugar
1/2 t. salt
juice of one lime (or lemon juice)
2 Thai chilies, finely chopped (optional, if using chili oil and you don't want it really spicy)

Bring to a simmer. Cook 5-10 minutes, stirring frequently. This sauce can be frozen in 1/2 c. quantities and then defrosted for a quick meal of peanut sauce, spinach and rice or soba noodles.